This page will be updated with more how to do’s.
TerrainComposer
How to flatten terrain for the use with Horizon[ON]?
You need to use a 16 bit raw greyscale image mask (can be easily created in photoshop). I made one that can be downloaded here:
Horizon Mask
Then do the following steps:
- Enable the ‘Height’ button in the top of the TerrainComposer window.
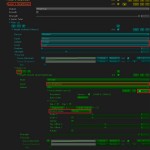
- Add a heightmap layer (click the yellow ‘+’ button). The layer should be at the bottom of all your layers.
- Unfold the layer and ‘Height Select0’ filter.
- Set filter ‘Output’ -> ‘Change’ and ‘Level’ -> ‘Layer’.
- Add a mask (click the green ‘+’ button) and unfold it.
- Set mask ‘Input’ -> ‘Raw Heightmap’.
- Click the ‘>Open’ button to load the HorizonMask file.
- If you use multiple terrains, in settings (unfold) set ‘Stretch Mode’ -> ‘Multi Terrain’.
- Click the ‘Generate’ button.
How to export and re-import the splatmap so that the manual painting with Unity terrain brush stays intact? And how to add additional splat texturing with TerrainComposer on top of that?
First you need to export the splatmap(s).
- Enable the ‘Splat’ and ‘Export’ button in to of TerrainComposer window.
- In the bottom of the TerrainComposer window choose a name and folder.
- Click the ‘Export .PNG’ button.
For every 4 splat textures Unity terrain uses 1 splatmap image, where each color channel (RGBA) is used for 1 splat texture. E.g. if you use 8 splat textures there will be 2 splatmap images. The image import settings for the splatmap images need to be:
Texture Type -> ‘Texture’.
Format -> ‘Truecolor’.
In TerrainComposer you need to add a layer for each 4 splat textures. And those layers need to be at the top of the layer list:
- Disable the ‘Export’ button in the top of TC window and enable the ‘Splat’ button.
- Click the yellow ‘+’ button to add a splat layer. Choose the splat textures you want to use for your splatmap.
- Unfold the splat layer and click the grey ‘+’ button to add a 4th splat texture.
- Unfold the ‘Splat Select0’ filter and put ‘Input’ -> ‘Image’.
- Drag and drop your first splatmap (A_0) into the texture slot.
- Unfold settings and enable the toggle ‘Splatmap’.
- Repeat steps 2-6 if you use more then 4 splat textures. Then step 5 use the second/third/etc splatmap. Can use shift click yellow ‘+’ button to duplicate your just created splat layer for step 2.
- Make sure the splat import layers are at the top of the layer list.
Now you can click the ‘Generate’ button and the splat texturing that was on the terrain before exporting will be there.
To do additional splat texturing on top with TerrainComposer we can add more layers. We need to use the filter output ‘Change’ (overlay) for this, as we want to over-paint the imported splatmap(s). We want to over-paint based on masks. In this example we will over-paint based on steepness (mask), where we use filter input also on steepness (to choose splat textures based on steepness).
- Click the yellow ‘+’ button to add a splat layer.
- Unfold the splat layer and unfold the ‘Splat Select0’ filter.
- Set the filter ‘Output’ -> ‘Change’ and ‘Level’ -> ‘Layer’ (We want to over-paint the previous layers).
- Set the filter ‘Input’ -> ‘Steepness’, as we want to select splat textures based on steepness (can choose your own input rules here).
- Choose the splat textures in the layer you want to use, you can use the min-max sliders to change the paint range of each splat texture.
- Click the green ‘+’ button to add a mask.
- Unfold the ‘Splat Alpha0’ mask and set the ‘Input’ -> ‘Steepness’ (can choose your own masks with input rules here).
- In the Curve (Normal) you can click the curve graph (with the line) to define your steepness rules (add/move curve keys).
- Can add more masks with rules based on your needs.
- Click the ‘Generate’ button.


